Monday, September 13, 2010

Mango Salsa Verde

I love a good Salsa Verde! The problem is I haven't encountered too many good jarred ones.  When I found out that we would be able to pick Tomatillos at our farm share, I was excited to make some myself.
Now I don't know if the tomatillos at the farm are all small due to being organic, or if we just didn't get to the larger ones in time, but the ones at left are the average size available, ranging from around 1/3 the size of the ones at the supermarket to the size of grape tomatoes.  This increases the labor, but there is no sacrifice in flavor! In fact, since I roast them under the broiler, the smaller they are, the more surface area gets that roasted flavor.
After removing the husk and rinsing well with cold water, I place them in a roasting pan and roast them on the top rack of the oven with the broiler set to high.  Here they are just before roasting, with an assortment of allegedly hot peppers, also picked at the farm share.
They will release a decent amount of liquid, so I put them on aluminum foil with the edges folded up.
...and just after roasting.
I should note here that I forgot to roast my garlic.  Usually for this amount of tomatillos, I would roast 5 or 6 cloves of garlic.  Since I forgot, I did it later, and didn't photograph it.
The peppers have been removed, and the tomatillos and juice are ready for the blender...
...like so.
They will sit there for a few minutes, while I clean the peppers.
I cleaned the peppers, removing all seeds and some of the charred skins.  I tasted one or two, and realizing that they were quite mild, added around half of them to the blender, along with the roasted garlic, about 1/4 cup fresh cilantro leaves, the juice of 1/2 lime (3 Tbsp-ish), 1/2 tsp kosher salt, and some fresh ground black pepper.
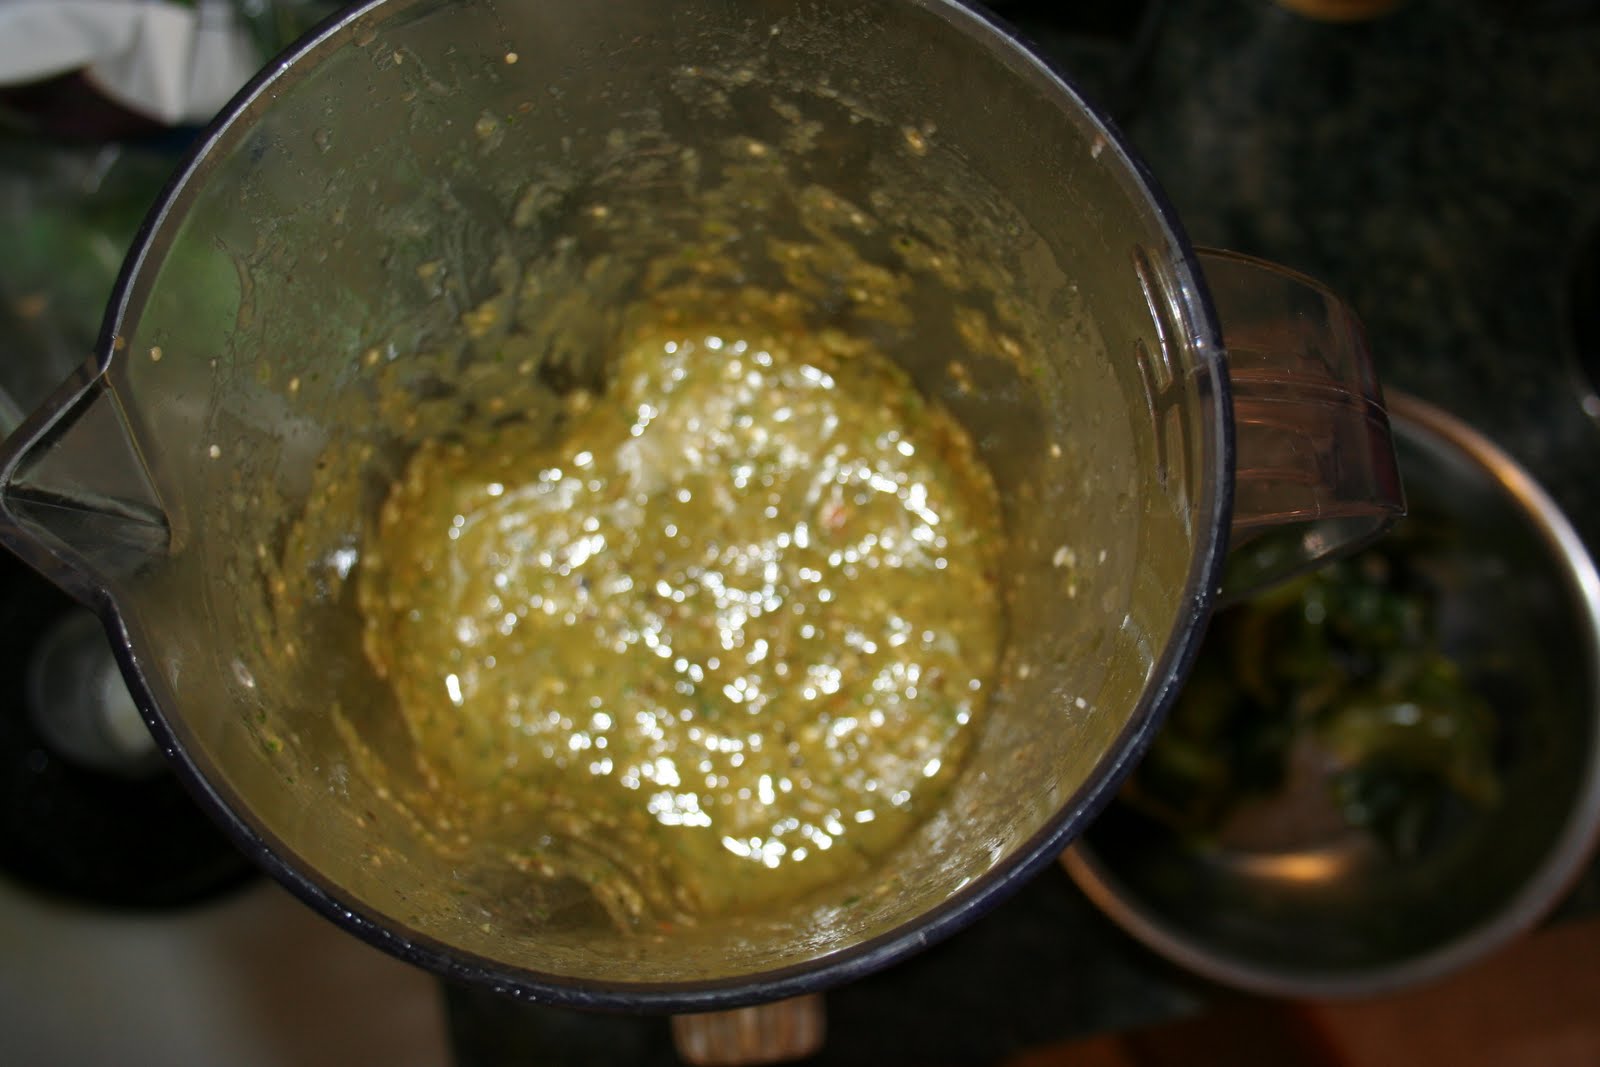
Pulse blend until you get tired of that...

and then put the blender on the lowest setting until it stops making funny grinding noises.
Pour finished Salsa Verde into a bowl, and stir in some chopped fresh mango.  I used about 1 1/2 cups.
Here is the finished Mango Salsa Verde.  We used it as a sauce for freshly pan fried Boneless Pork Chops, and will use it on the fish Tacos I plan to make later this week.  Hopefully, I will get out to pick some more of these tasty little flavor bombs next Saturday as well!
Enjoy!

Sunday, September 12, 2010

Lazy Sunday Part 2. Bacon Cheeseburger Meatloaf


Here it is, only my third post and I'm already back to the ground beef.  I was planning to make Moussaka last Thursday before we got the boys back, but I ran out of time.  So I had the ground beef in the fridge, and needed something the boys would like.  Moussaka?...  not so much.  Ethan and Owen like their meat, and they like it by itself. Since Erika went to pick up our farm share, and brought back some nice fresh sweet corn, It only seemed natural to go with a meatloaf... and what better way to dress up meatloaf than bacon and cheese?
So just like the meatballs, I broke two eggs into the big bowl, added 2.2# 90/10 lean ground beef, seasoned breadcrumbs, paprika, dried parsley, dried basil, dried oregano, garlic powder, onion salt, kosher salt and fresh ground black pepper.  You can use whatever meatloaf recipe you like.
Mix it well.
Line a 9" loaf pan with 5 slices of bacon.  This left me with one slice so I threw that in too, following the "you can never use too much bacon" theory.
spread 1/2 to 2/3 the meat onto the bacon
add slices of cheese, your choice.  I used 3 slices of gouda... because that's all I had.
Spread the rest of the meat on top.  Place in a 375 degree oven...
At around 45 minutes, I tipped the pan to drain off the extra fat, and then tipped out the loaf, upside down, onto a foil lined broiling pan, or in my case a cooling rack on a baking sheet covered with foil.
At about an hour, with an instant read meat thermometer reading 160 degrees, I removed from the oven for serving.
If I had any more cheese, I would have placed two slices on the top for the last 5-7 minutes.
Still the slightest bit pink in the center even with the thermometer reading over 160 degrees.
Served with smashed red potatoes, fresh sliced heirloom tomatoes and fresh cucumbers, and fresh corn on the cob,  it gets a big thumbs up from Owen.  Ethan liked it too!

Lazy Sunday Part 1. Black Bottom Banana Bread

I am not very experienced when it comes to baking.  It doesn't fit in as well with my practice of not following recipes or directions.  Today I broke with tradition and decided to use up the overripe bananas that were hanging around and make some banana bread. (This was after only using two of them in the fried banana topping for the chocolate chip waffles I made for the boys.)
 I did my usual recipe trolling on the internet and decided on a black bottomed banana bread with a crumb topping.  Of course, after I started following the recipe, I realized I didn't have all the ingredients that it called for, so I went off script and the results were better than usual this time!

Ingredients:
Bread:
1/2 cup softened unsalted butter
1 cup sugar
3 overripe 7" (average) bananas
1 3/4 cup all purpose flower
1 egg
1tsp salt
1 tsp baking soda

Crumb Topping:
1/4 cup Bisquick
3 Tbsp rolled oats
3 Tbsp brown sugar
3 Tbsp butter (softened)

Preheat Oven to 350 degrees F and grease a 9" loaf pan
Mix the butter and sugar until creamy, then add the bananas...
mixing until... uh... mixed.
Add the rest of the dry ingredients and the egg, and mix until smooth.
Separate the batter into two roughly equal amounts, and mix two tablespoons cocoa (I used Ghiradelli) into half.

Pour the chocolate half into the pan, then pour the rest of the batter on top.
 Mix the crumb topping ingredients in a bowl with a fork until crumbly, and pour on top of the rest.
Bake in a 350 degree oven 35 minutes or until a cake tester (I use a toothpick) comes out clean.
Cool for at least 20 minutes.

Eat delicious chocolatey banana bread.

Thursday, September 9, 2010

First Things First. Whole Wheat Spaghetti and Meatballs


Well, first things first... A photo essay of my Spaghetti and Meatballs process. I say process because it isn't really a recipe.  It's more of a template... that changes... a lot.  I have advanced a long way from my early years of browning a pound of ground beef, adding a couple tablespoons of garlic powder and a jar of Prego.  My first attempts at real gravy came after watching The Godfather where they showed me how to do it. Although I usually use imported canned Italian tomatoes, at this time of year, living here in New Jersey, there is no excuse for not using fresh grown Garden State tomatoes...  except maybe time... and I have too much of that.  
I know that I should have started with a beauty shot of the fresh New Jersey Plum Tomatoes, sitting in a rustic basket on my sun dappled marble-ish countertop, perhaps with a bunch of freshly picked basil slightly out of focus in the background, but I didn't think of it in time.  Anyway here's 4 dollars worth of Jersey's finest from the Trenton Farmer's Market, all blanched and skinned, ready for me to abuse.  
For the uninitiated, blanching is boiling for 2-3 minutes, then plunging into cold water to stop the cooking process.  I prepped the tomatoes first by coring them (or cutting off the top in some cases) and cutting an X in the bottom.  This makes the skins fall off quite easily.
In the last photo you can see a blue plastic colander.  I crush the tomatoes by hand into this colander and rinse under cold water to flush out the seeds and gooey membranes, leaving only ripe tomato fleshy goodness... which goes into the pot on medium.  Stir often.


Then turn this...
into this...
Honestly I never used to do the carrots in the sauce thing, but when pureeing the sauce... which we will be doing... the sweetness really cuts the acid nicely.


Then Sauté the carrots and onion in about a tablespoon butter and a tablespoon Extra Virgin Olive Oil...


adding the garlic towards the end, so as not to burn it.
Also always sauté on medium high, not high. 
Don't forget to stir the tomatoes from time to time!
Then chiffonade some  basil and chop some flat leaf parsley
To chiffonade basil, roll the leaves up in a mini cigar, then slice very thin.
Add to the mix...
sauté briefly.
Then I add a small can of tomato paste to the veggies, and mix well.  This is also when I do most of my seasoning with additional dried spices like oregano, maybe some marjoram...
Once mixed, I add it to the cooking tomatoes, then puree in a blender in small batches...  If I am using canned crushed tomatoes, I usually leave it chunky (and use a little sugar instead of carrots)


...return the pureed sauce to the stove, on a nice low boil, stirring often. Season to taste with salt and pepper... I forgot the bay leaf this time but I usually add one or two of those as well... it varies according to whim.


Next... the meatballs.
This time I used all 90/10 ground beef.  Erika's boys were returning home after a 3 week vacation with their father, and I wanted to make their favorite.  Usually I use a beef/pork/veal blend, and lately, I have been using half 90/10 ground beef and half sweet Italian sausage, but the boys like their beef, so I went that way this time.
I break my eggs first, so I don't have to pick accidental shell fragments out of the meat, and in case of a bad egg... Then I sprinkle the dry ingredients on top in proportions that look or feel right.  I have added dried parsley, salt, pepper, and garlic powder to the ingredients in the previous pic.
2.4 pounds of meat...  39 meatballs... this time.
Brown in batches... These required some Extra Virgin Olive Oil... when I use pork they do not.
browning... and sticking a little... sausage in them would solve THAT!
After all the meatballs have been browned and added to the boiling sauce that you haven't forgotten to stir, deglaze the pan with some red wine, and add the scrapings and wine to the sauce.
Here is the pot of meatballs and gravy, all ready to simmer for a while... the longer the better...


...and the beauty shot once again!